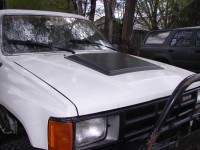
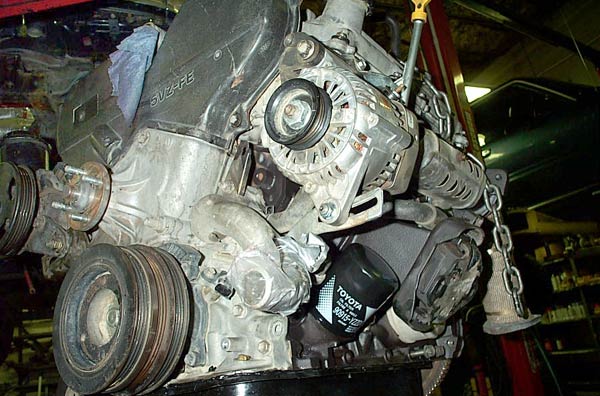
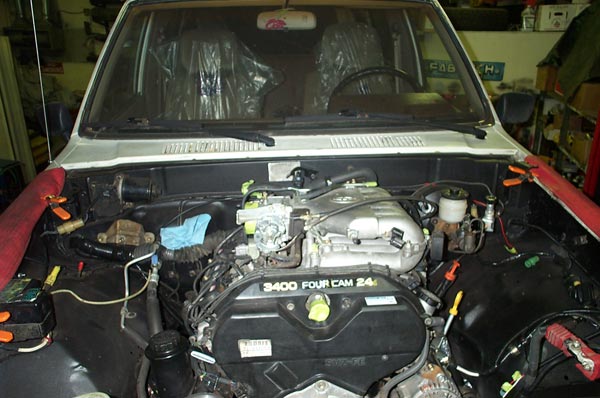
Since age 13 Rob’s stepdaughter had always wanted an ’85 4runner. What better gift than to receive such a vehicle with the power and reliability of the more advanced 5VZ-FE 3.4L V-6? When we got it, the Runner looked like any other, standing out by only a few inches of lift and some 35 inch tires.
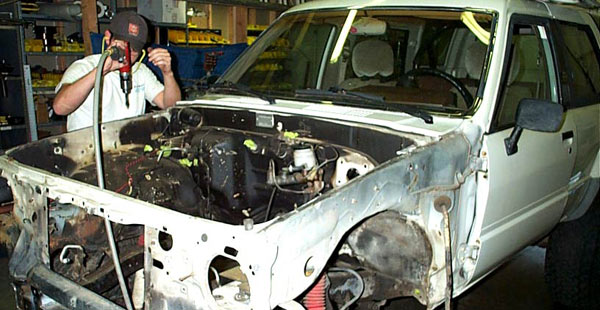

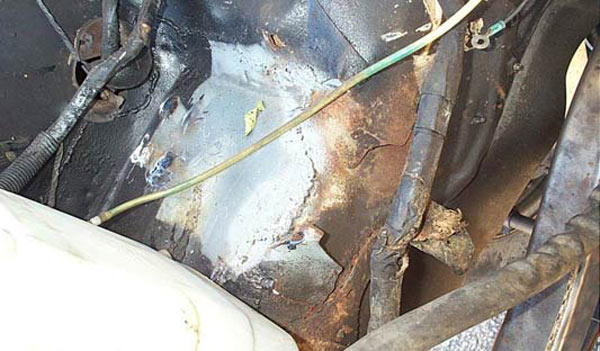

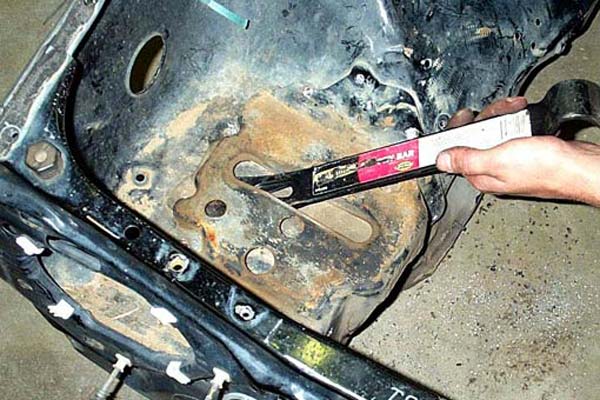
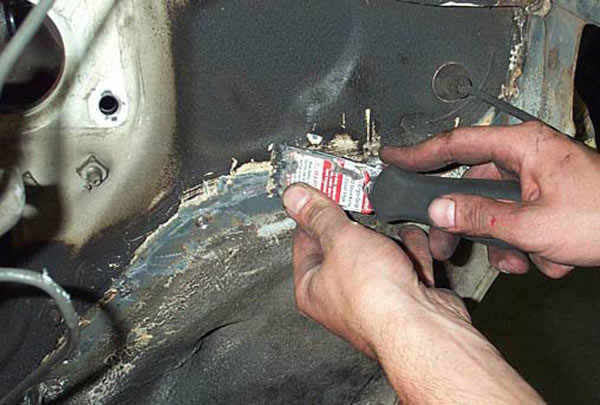
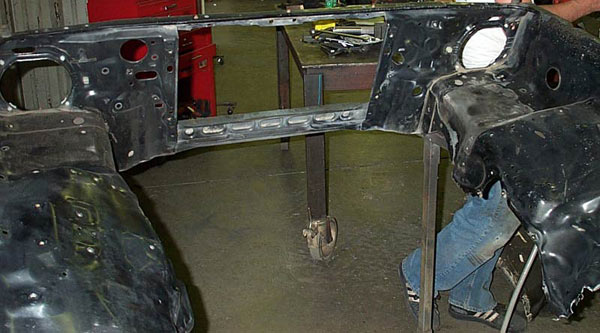
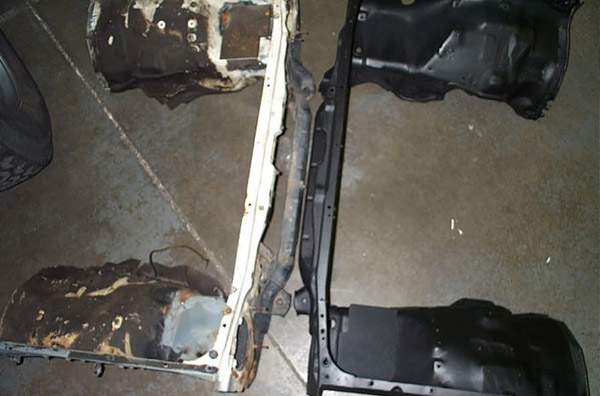
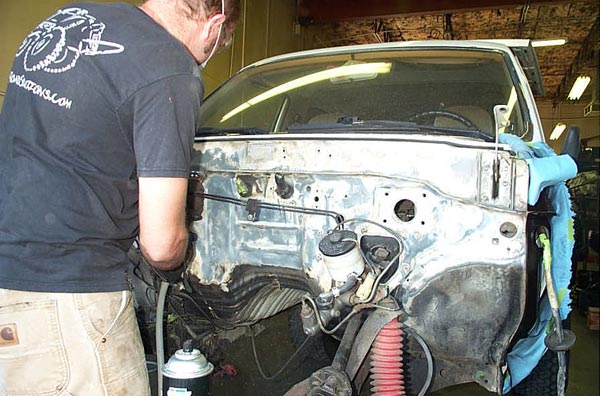
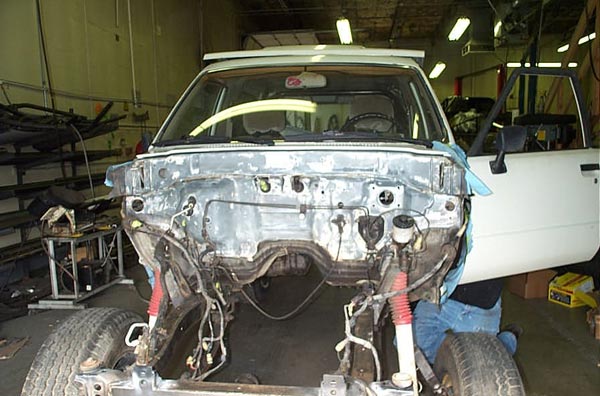
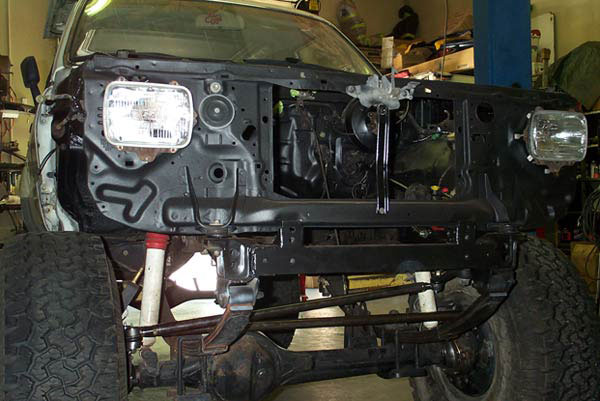
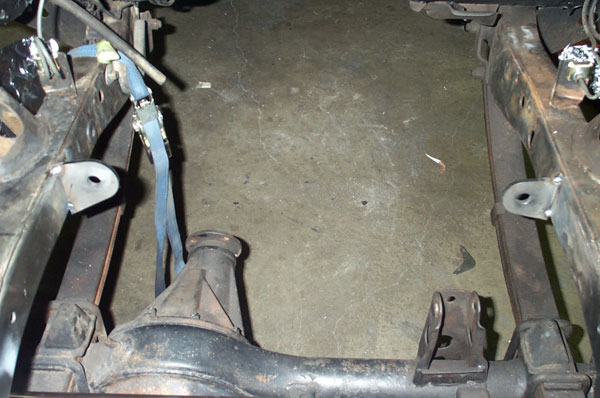
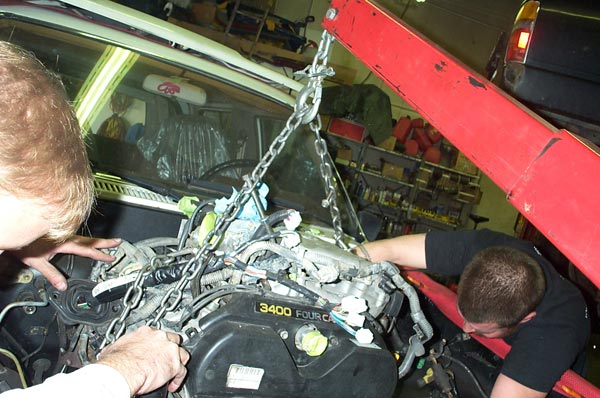
We immediately removed the tired old 22R-E from the bay along with the drive train so we could best fit new life into this 22 year old treasure. After that we saw the state of the front clip, and it wasn’t pretty. Instead of pouring countless hours trying to restore a “cancered” out piece, we got a clip that was in much better condition, removed the standard battery tray, sanded and buffed down the new one, then welded on a much better looking tray on the other side of the clip to accommodate battery relocation for the intake. We then sanded this new clip and applied truck bed lining to the entire part, giving us a very clean start. There was also some rust traveling from the clip toward the rest of the body. We took the time to remove this rust and repair where necessary. We are reinstalling the clip, cleaning and painting the frame, then installing a cross-over steering setup with our HD frame mount system and Marlin Crawler billet high-steer arms.


After that comes the motor, auto trans, dual gear driven transfer cases, and Front Range crossmember. Future plans include gears/lockers, Alcan springs, ORS shock mounts, ORS bumpstops, and an ORS front winch bumper.
You can follow our step by step picture documentation on TTORA, Pirate4x4, or Yotatech forums. Stay tuned!
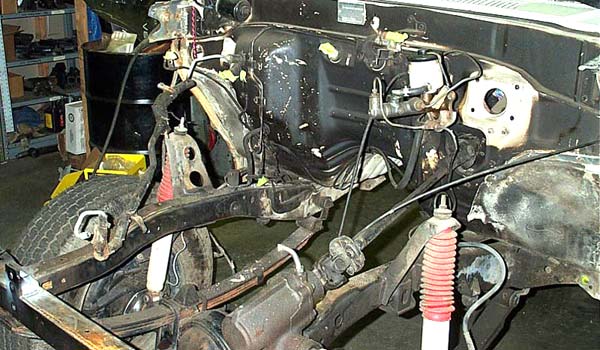
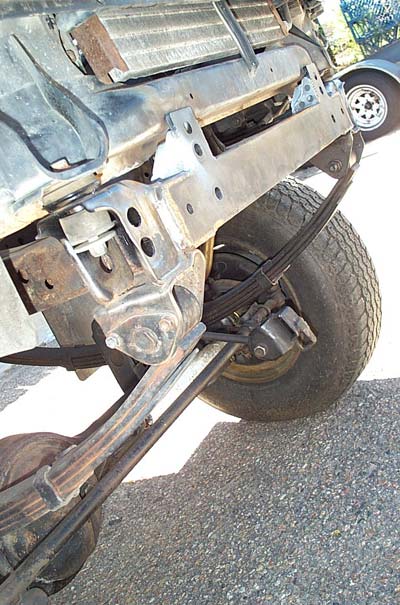
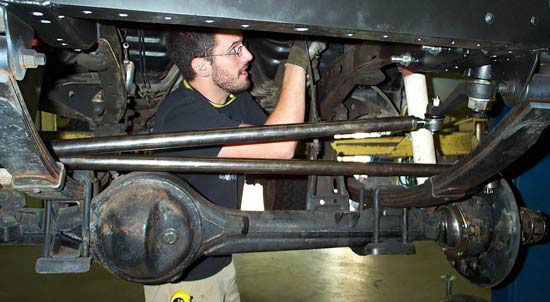
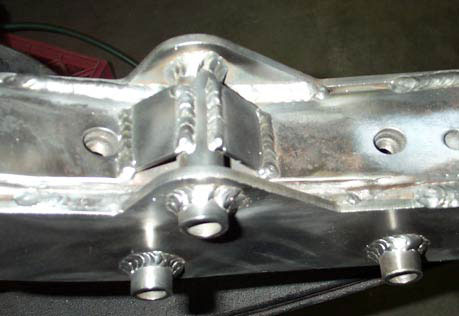
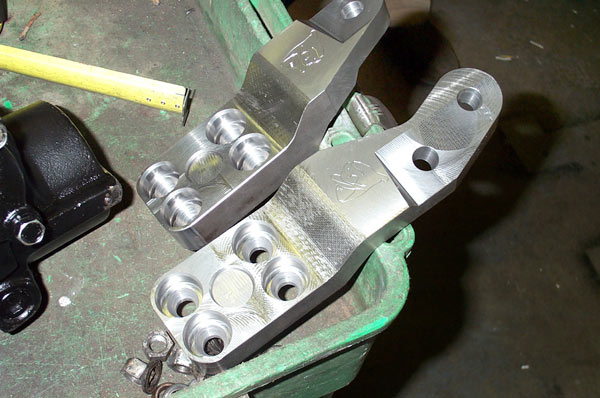
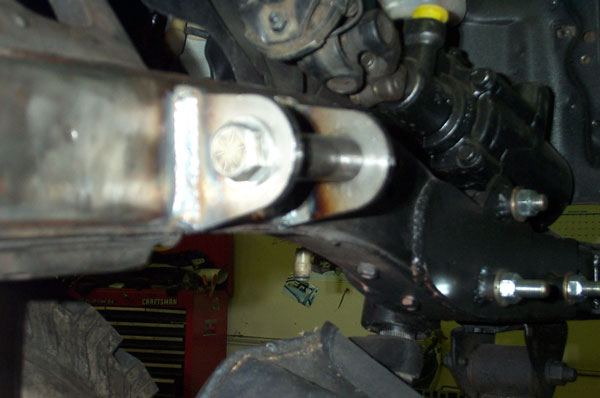
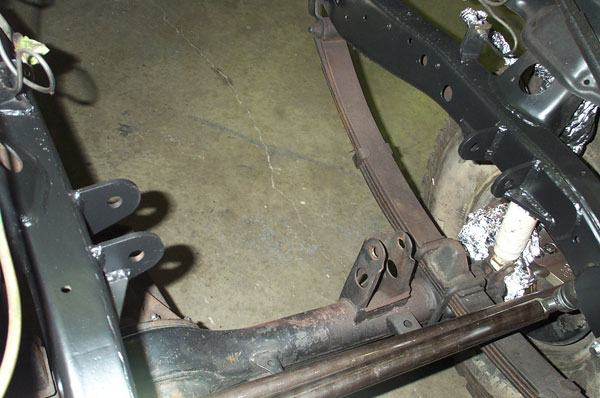
After finishing the front clip it was on to the Marlin Crawler crossover steering kit our customer wanted to convert to. This would have been much harder with the engine installed, so it was logical to do this first. We first cut off his old power steering box mount, then ground and buffed it down. We then had to remove the old steering system. With that removed, we then bolted up the Marlin steering arms (which were not only prettier, but twice as thick too) while achieving the proper trunion bearing preload. Then we installed and adjusted the tie rod, followed by the draglink. After that we welded on the stout frame plates and bolt holes so it could accept an IFS steering box. After everything was checked the box was removed and everything was painted black to match the rest of the engine bay.


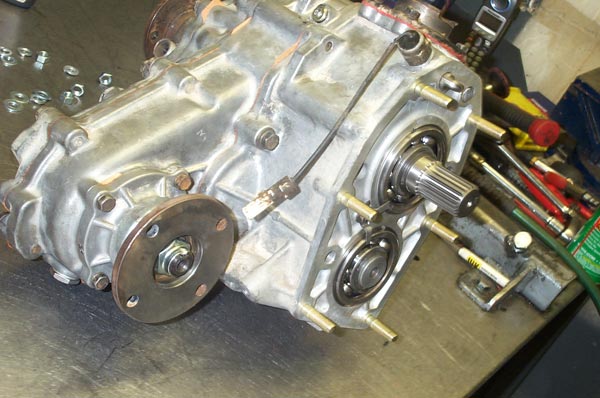
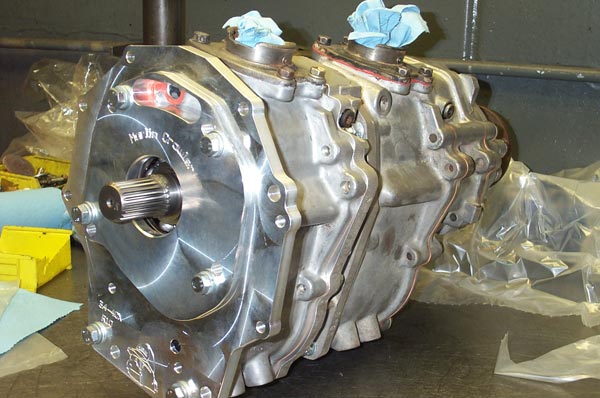
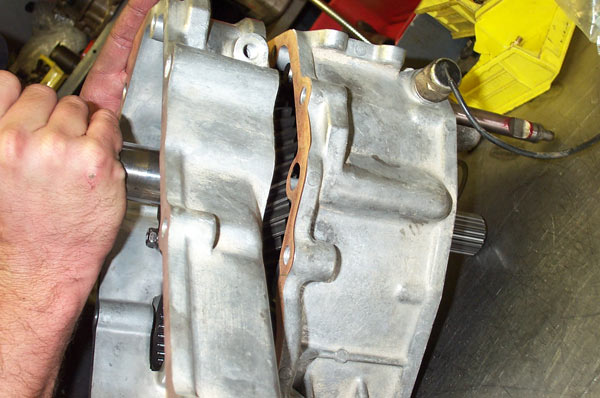
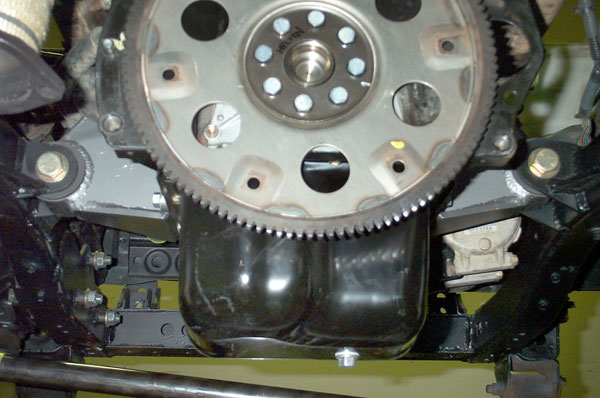
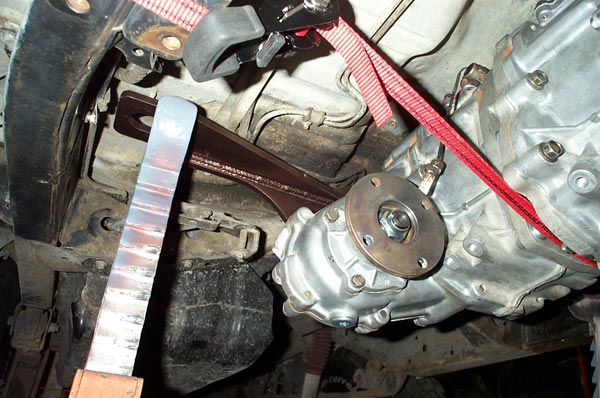
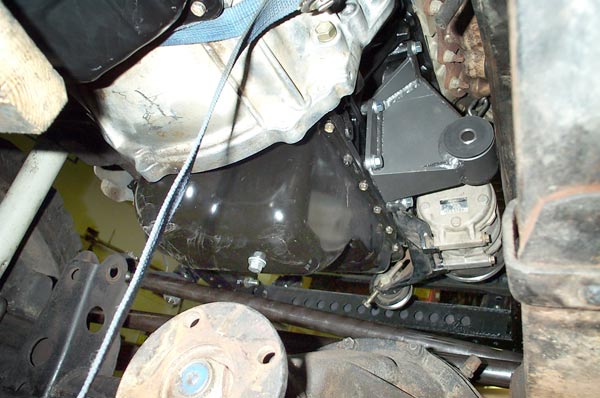
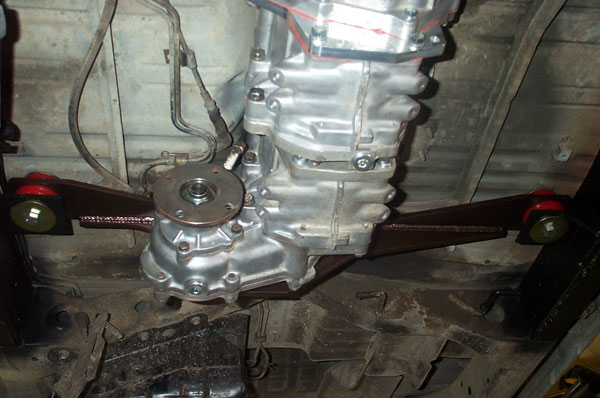
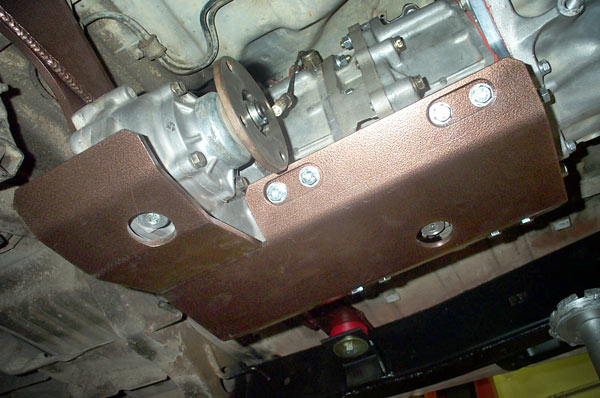
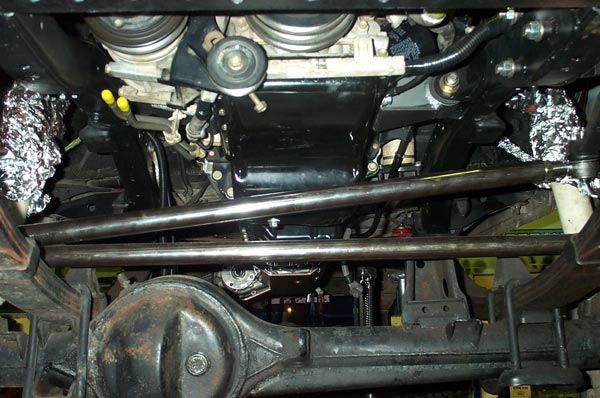
We fully rebuilt, cleaned, and resealed both transfer cases with Marlin’s Beefy 23 spline input and 2.28:1 gears. There are lower gearing options but we think this will work very well behind the auto and an engine with power. Dual cases (85 4cyl gear driven) were then assembled and mounted to the A340 auto transmission out of an 01 Tacoma. We used a Marlin transmission adapter and a Marlin MC07 doubler. This will all be mounted with a x-member from Front Range.
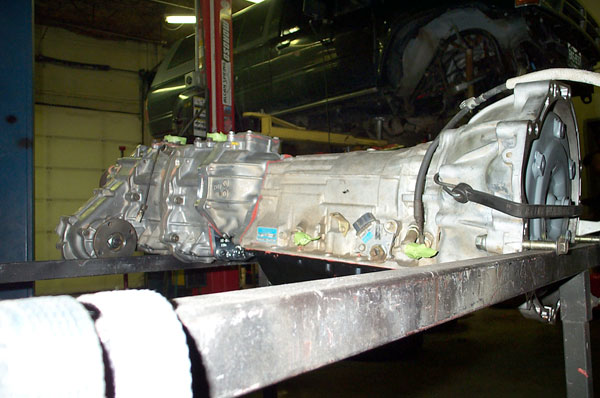


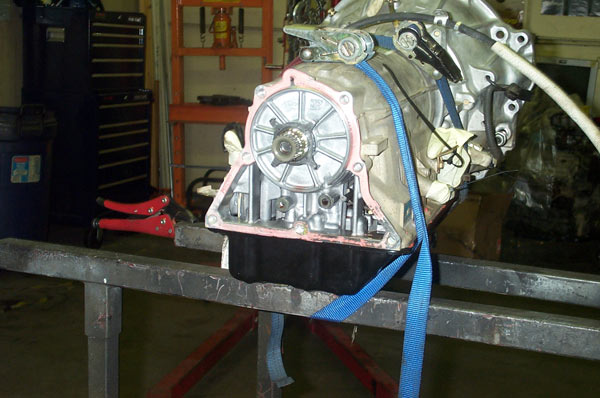
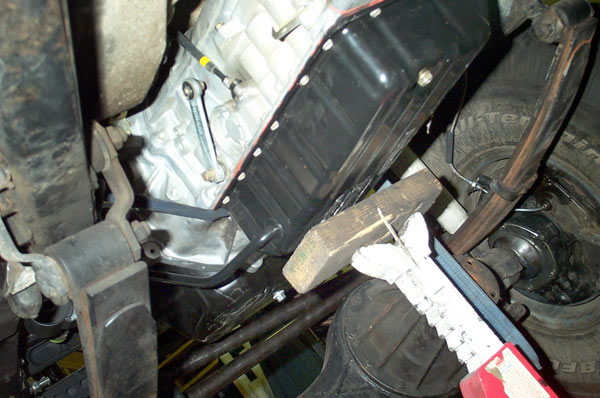
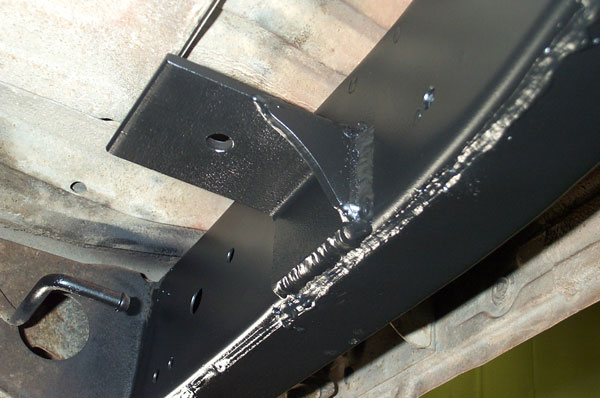
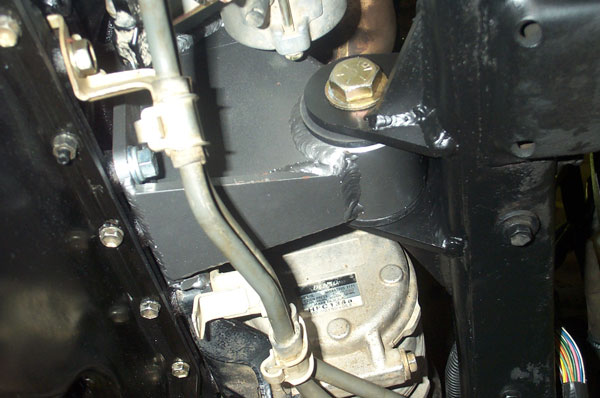
Since our customer was wanting both a dual case setup and an engine conversion into an older truck at the same time we had to mock up brackets with the engine and transmission in as they will sit (and yes, bolted together). We set him up with some of our ultra stout performance engine mounts as well. With the mounts we made some custom frame tabs to ensure the best fit possible. The transmission is mounted using a Front Range Off Road crosssmember. This was not a simple or easy process; since the engine and the transmission were both modified and/or changed at the same time, all the mounting had to be measured, re-measured and mocked up in one tedious step. Careful measuring and examining went into checking many clearances: exhaust to firewall, transmission tunnel to transmission and bellhousing, shifter to trans, fan to radiator, oil pan to steering, axle, and suspension, not to mention getting the engine straight after appeasing all of the previous gods. As a note, even getting the engine in the bay as space conscious as we were, the clearance between the ORS crossover and the firewall was still marginal!
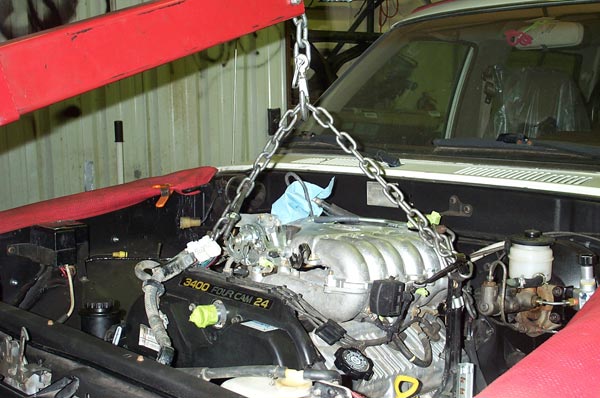
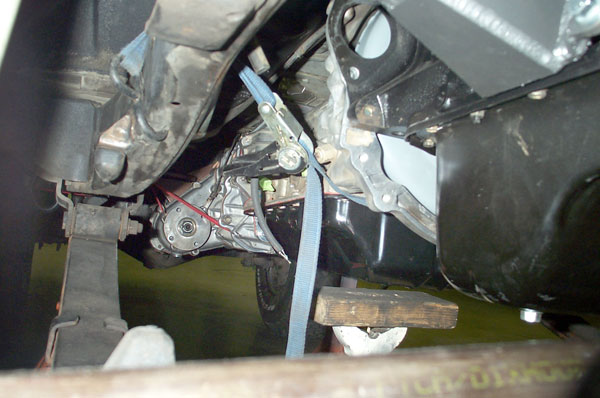
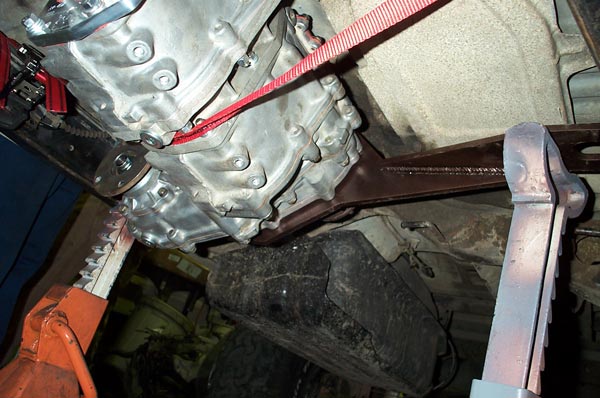
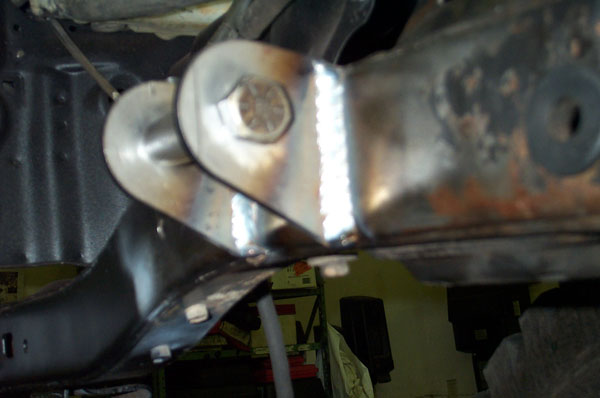

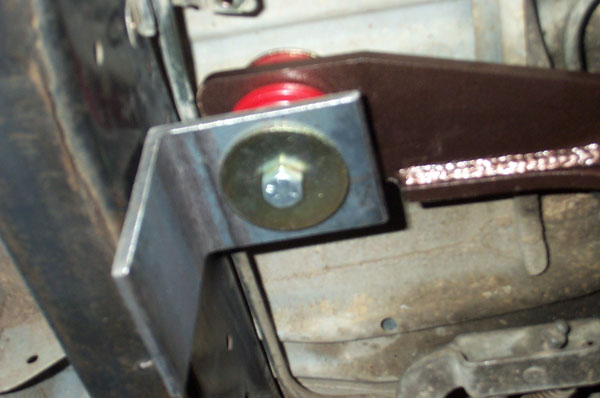
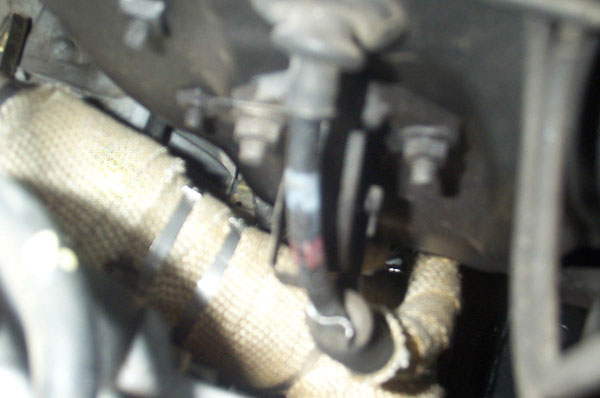
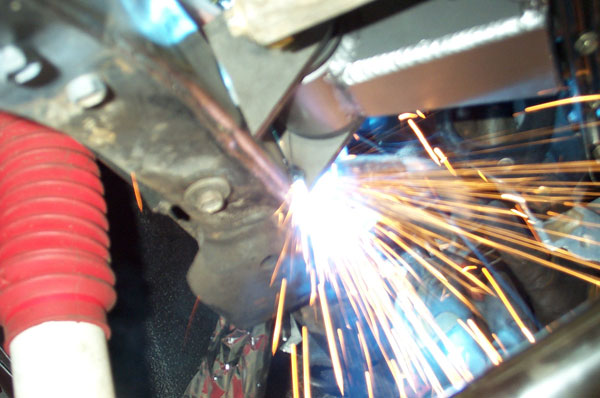
After tacking the engine tabs and the transmission brackets into place, we unbolted and removed the engine and transmission. The engine mounts’ frame tabs and transmission mounts were then gussetted and the welds were finished. After that came a thorough frame cleaning and painting. We also heat shielded the E-brake and speedometer cables where they run close to the exhaust, thus protecting them against melting/becoming brittle.


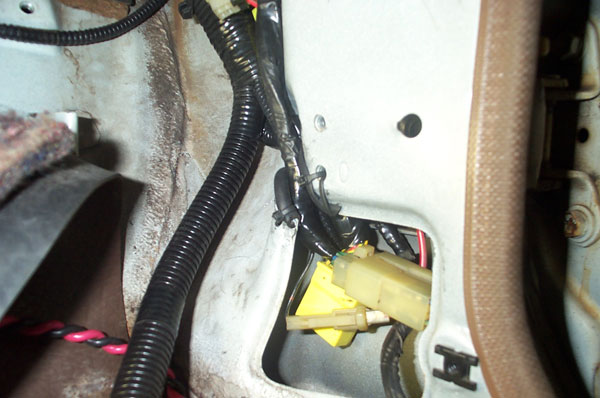
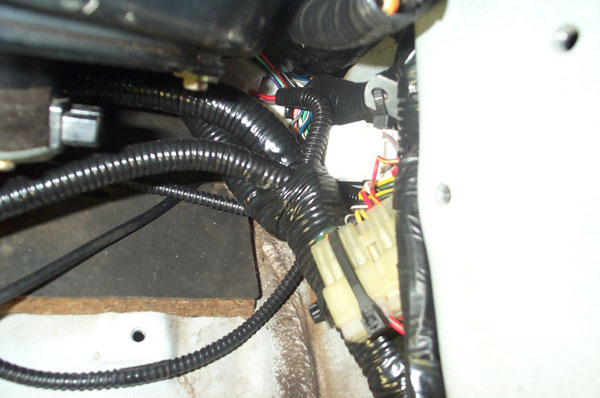
Once the paint had dried, we installed the engine then transmission/tcase for the final time. Believe it or not, it is all down hill from here! The engine harness is now routed, and our conversion harness is installed. As we installed the conversion harness we tucked it away above the kick panel, which offered a cleaner, sleeker look. Also, we notched the body for the leads to the original dash harness and tucked them behind the ECU. This was a little more time consuming, but we desired to be continuous in the streamline, OEM looking work already done. The space allotted for the wiring is already cramped, so giving the conversion harness a clean install took some thought. After that we installed the ECU in the passenger side kick panel.
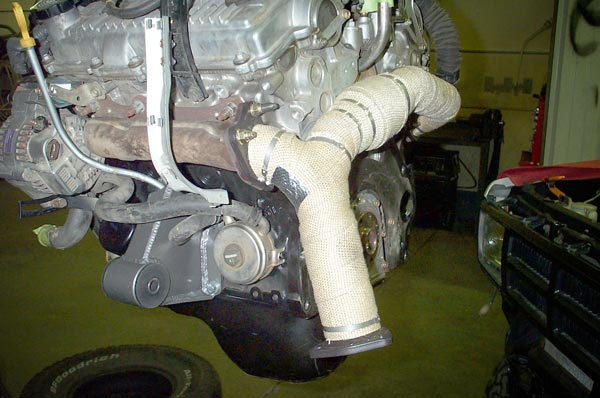
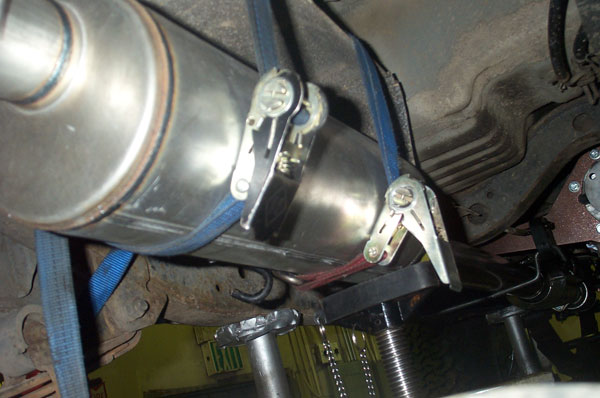
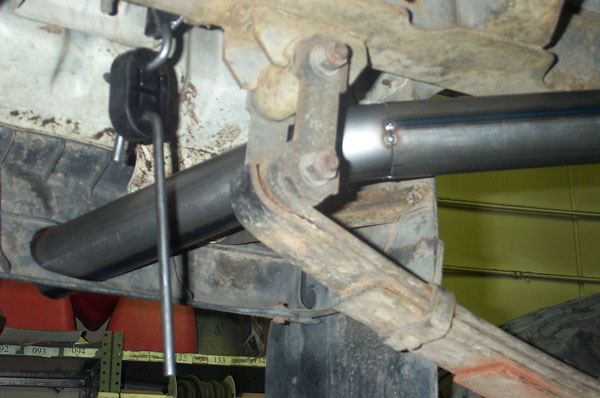
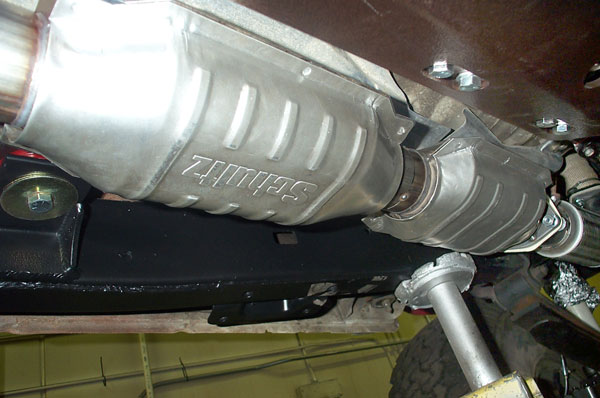
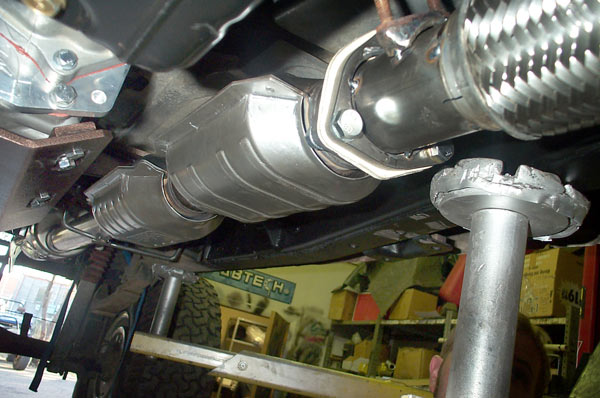
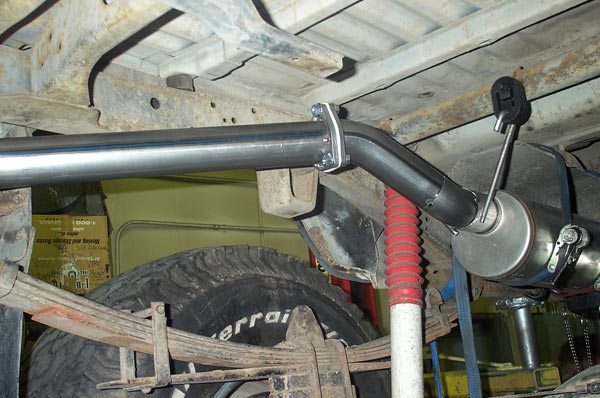
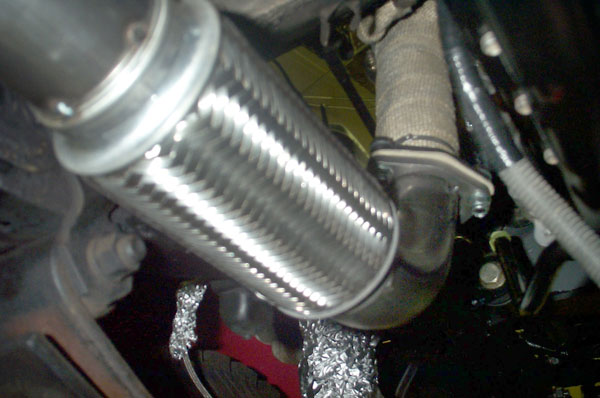
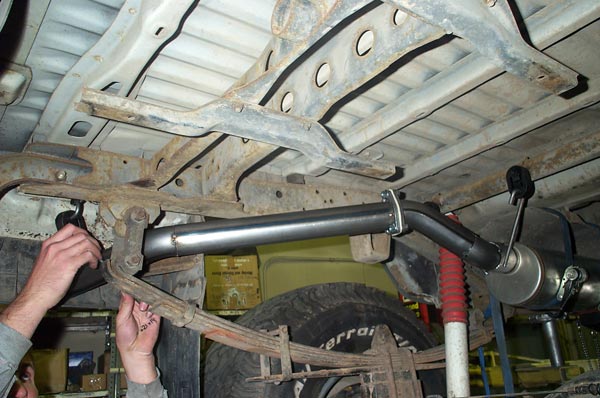
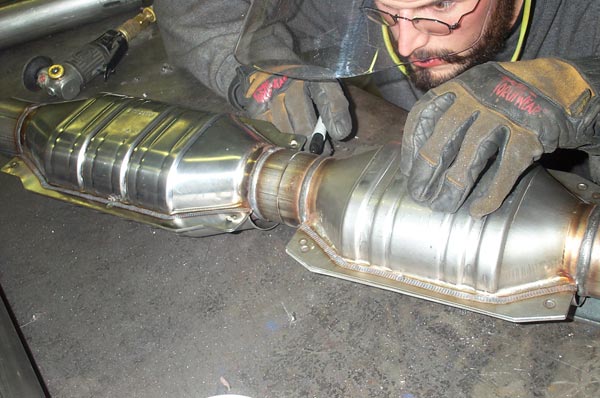
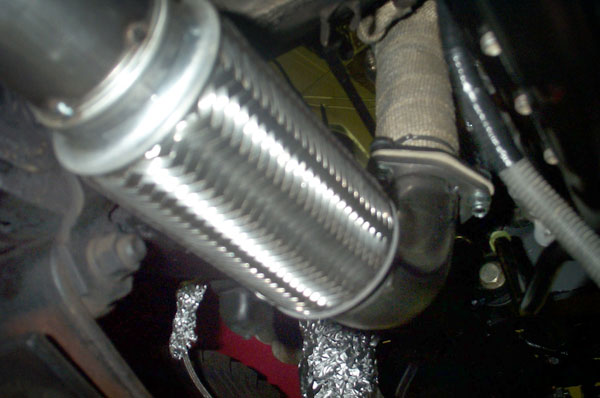
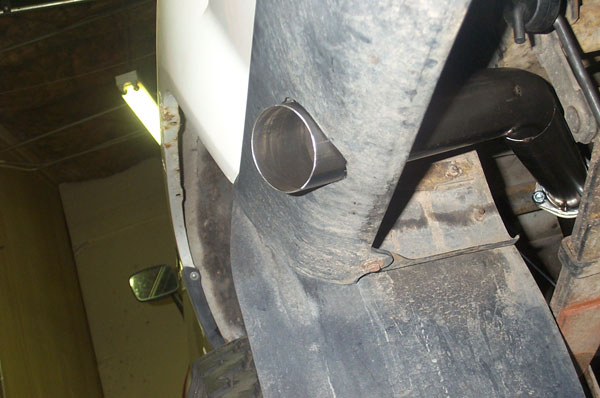
We then moved to the exhaust from the crossover’s outlet back. We opted to make the exhaust out of 2.5” tubing to maximize the 3.4l’s efficient flow properties. Although all the hangers were new, we used all the original mounts on the frame. To preserve the exhaust from cracking we began with a flex coupler. The 3.4L’s emission system requires two oxygen sensors: one before and one after the catalytic converters (did we mention this ’01 engine requires 2 converters?). The whole exhaust was custom made, so it came with no bungs for the oxygen sensors, meaning we had to weld them in ourselves. The cat and muffler then were routed over the rear spring and through the plastic under the rear quarter, looking sweet as well as functioning as a preparation for a custom aftermarket bumper. Stay tuned for the coming completion of this project very soon!


Wiring
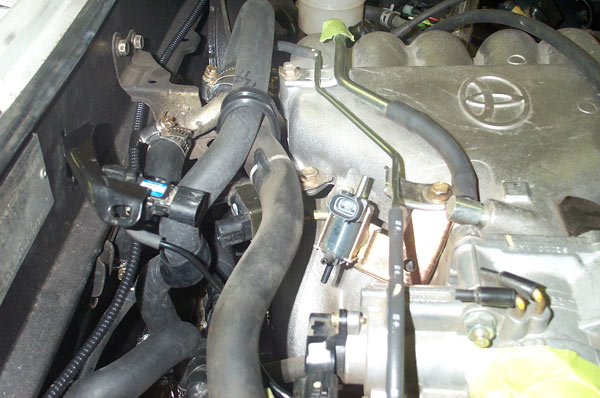
After mounting the engine, we moved on to wiring. A portion of the 3.4L engine harness is routed down the driver side of the engine to power the oxygen sensors and transmission. This portion of the harness runs close to the exhaust in some places. We really took our time to be sure the harness was properly routed and fastened to prevent any movement from our desired routing.


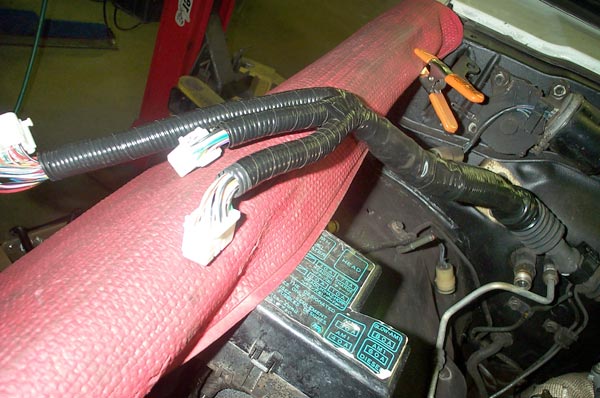
Next we routed the engine harness inside the cab. Before doing so, we remove the oversized Tacoma firewall grommet, fully loom, and tape this portion of the harness. Clearance is very tight under the dash and we want to make sure the wires are fully protected from “squishing.” We route the engine harness behind the EVAP canister. We find this to be clean, secure and provide the most length possible.
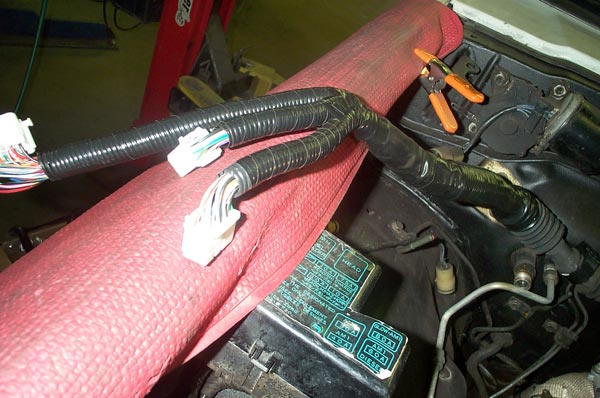
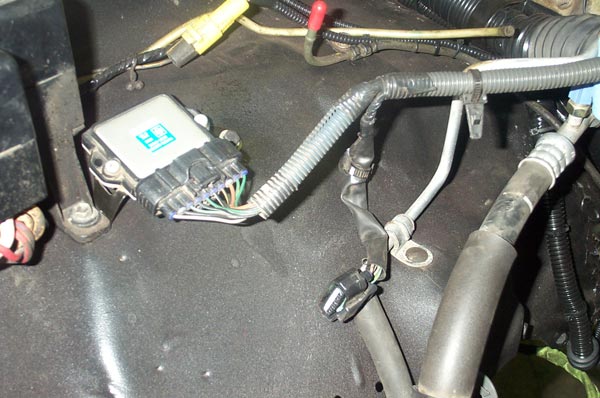
At this time we start the ORS harness install. We connect everything in the P/S kick-panel area and send all the leads on their way to their final destinations. The biggest challenge is cleanly stuffing this and the engine harness up and out of the way so the ECU can be neatly mounted. We carefully stuffed the harness upwards, next to the “dash” components. We did something a little extra on this one – we cut a notch in the body to allow part of the ’85 dash harness to tuck neatly and safely behind the ECU. That’s vacuum hose on the edges to protect the wires. At this point we routed the relays from the ORS harness near the evaporator and cleaned everything up.


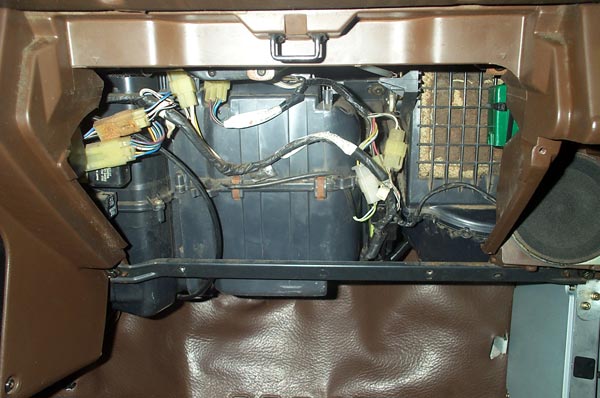

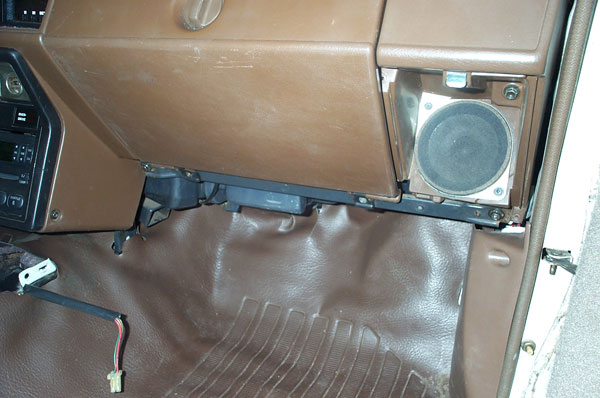
Next we fumbled around with the stock and ’01 ECU brackets and got the ECU to neatly bolt up. We’re glad we took our time here, it sure does look stock to us!
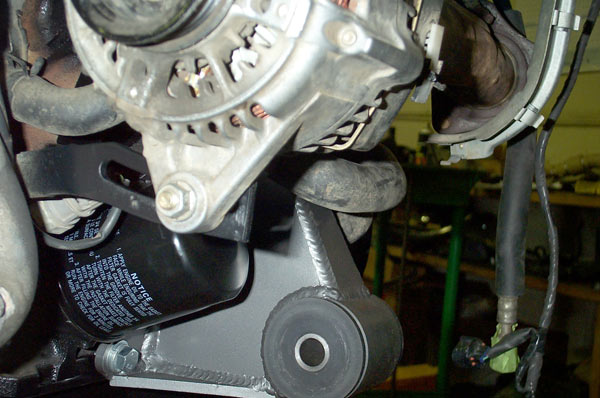
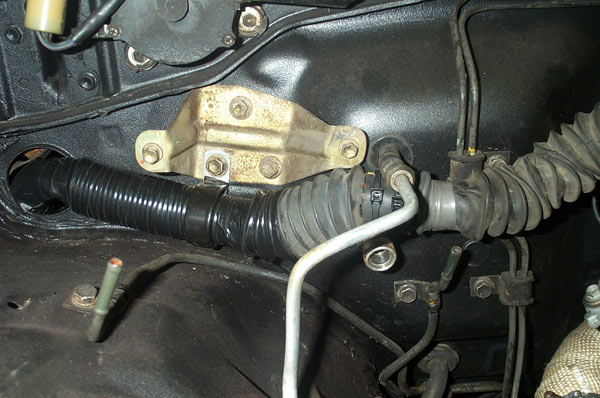
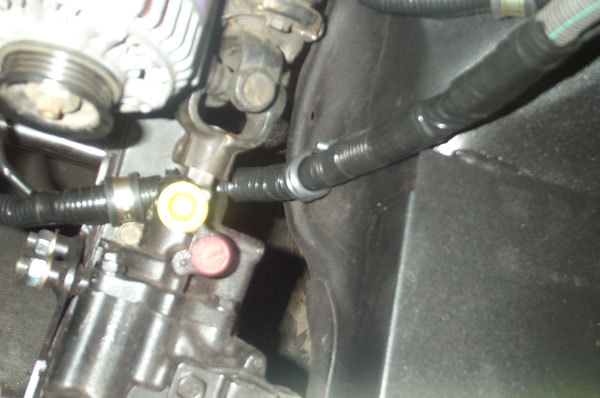
Next we moved under the hood. For the battery cables we used the 3.4L battery cable harness. We routed this harness in its stock location on the engine then under the steering shaft and up to the battery. We used 2 closed clamps to ensure the harness cannot contact the rotating steering shaft. Sometimes the battery harness is damaged or too short for this; ORS does offer an enhanced replacement of the Battery Harness.


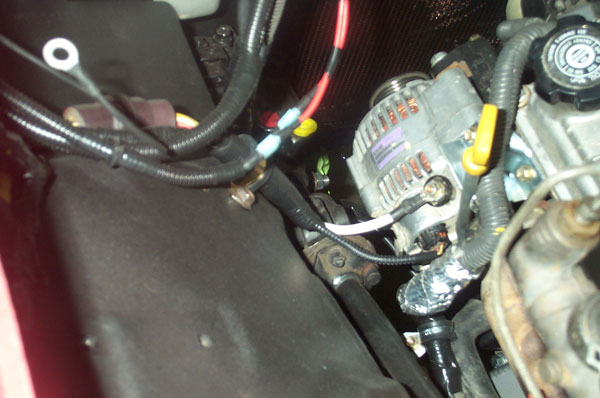
Next was the fuse box wiring. We spliced into the ’85 fuse box main cable and extended this cable (8 ga) across the front of the engine bay to the new battery area. We will be installing about 3” of the proper size fusible link wire at the battery for added protection. The alternator wiring was simple. We simply mated the ’85 harness to the connections on the 3.4L battery harness. There are 3 small wires and one larger cable. Luckily, wire colors match on all EFI Toyota trucks. We recommend running the alternator main cable back into the vehicle’s original cable so that it’s fused properly.
Exhaust
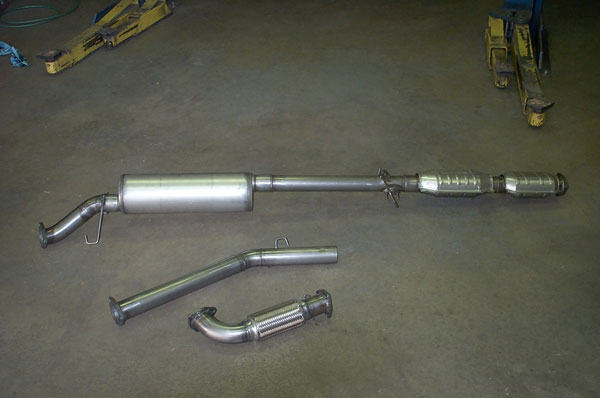
We really enjoy this part, we get to make sparks. This exhaust required the use of 2 catalytic converters (some ’00 California models and all ’01 and later models require the use of 2 converters). The ORS Exhaust Crossover Pipe includes an additional weld-on flange to build the exhaust system from. We started there, then added a flex coupler; we start all exhaust systems that way. Whether using headers or our crossover pipe, the flex is cheap insurance against the life of the headers or crossover. Next we installed both converters, then a flange, then the muffler, another flange, then the tailpipe.


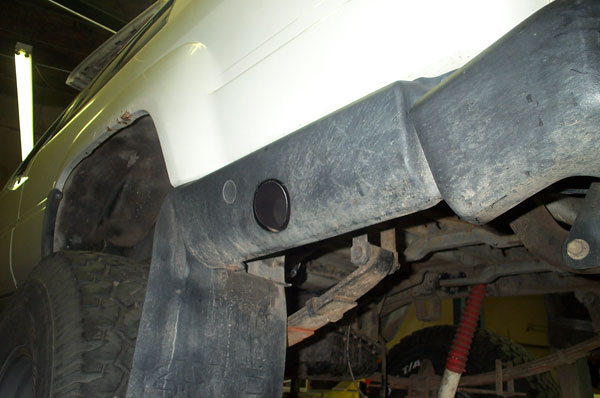
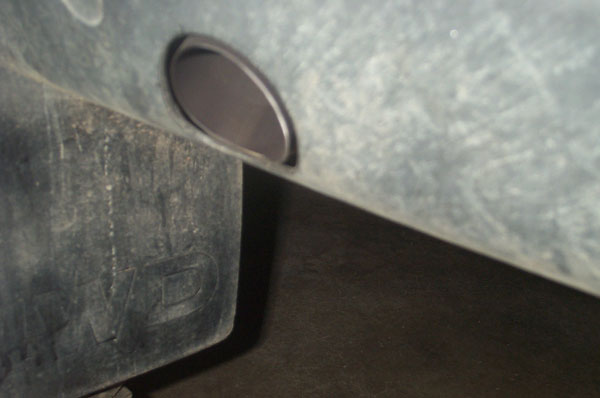
Our fabricator was pretty excited about the trick tailpipe exit. The customer may be adding an aftermarket bumper soon and didn’t want the tailpipe hanging very low at that point. We fixed that problem by exiting the exhaust through the plastic valance thingy. He couldn’t stop there, he had to trim it to exactly fit the round-shaped valance.

Under Hood
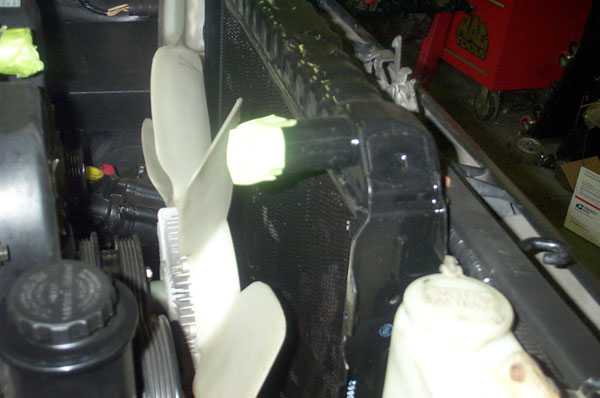
We started installing the under-hood components. We drilled holes and mounted the 3.4L igninter. We installed the 90-95 model 3.0L V6 radiator. These are nice because they bolt directly up and provide enough cooling even for AZ w/ A/C. The fan and pulleys were installed. We will be trimming the matching radiator shroud to fit the larger 3.4L fan.
For the A/C we acquired lines/hoses, and the compressor fitting “bulkhead” from a 2nd gen 4Runner. After swapping the fitting bulkhead on the 3.4L compressor for the ’93 bulkhead we were able to connect the lines directly to the vehicle and the A/C hoses directly to the compressor.
We installed the ORS heater hoses with only a little trimming. Next we mounted the EVAP electrical parts (3). These will be plumbed next.
Shifters
With A/T swaps the shifter is always a challenge. We used the shifter assembly from the ’01 and retro-fitted it to the ’85 floor. Because we moved the drivetrain so close to the floor the clearances were tight. This required us to trim the shift linkage a little to clear the floorboard. We certainly had an advantage here because the ORS 3.4L Performance Mounts and the Front Range Crossmember won’t allow much drivetrain wrap.
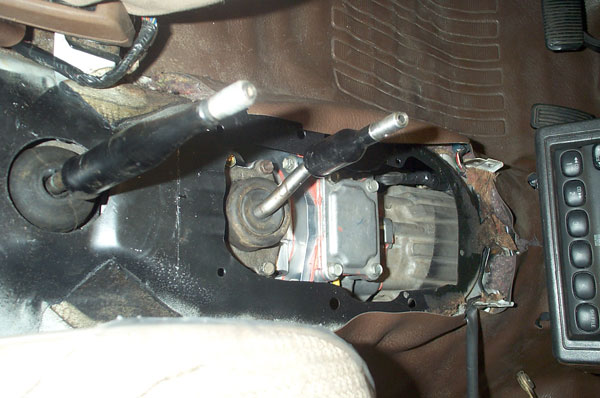
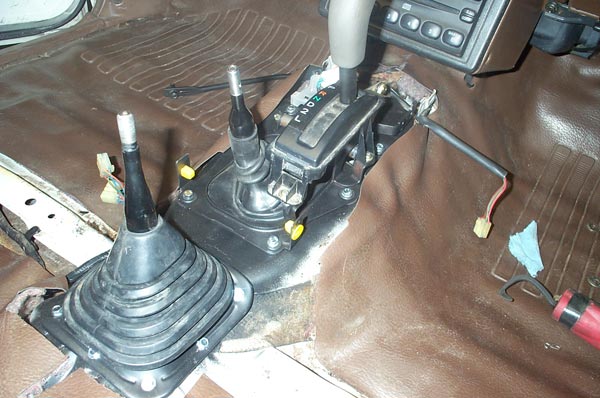
Next we drilled holes in the floor to mount the new trans shifter. We were able to modify the ’01 transfer case shifter to fit the first gear driven case. This shifter had a nice bend in it that put it through the floor in the ’01 transfer case shifter boot (in trans shifter). After that, one clean hole had to be drilled 6.5” rearward of the first gear driven shifter hole for the second transfer case shifter. We used a 2.5” hole saw for this hole and sealed it with a Toyota 2WD transmission shifter boot.
Once everything was tested we pulled the shifter assembly and rear boot out to paint these parts and the floor we modified.
More Plumbing
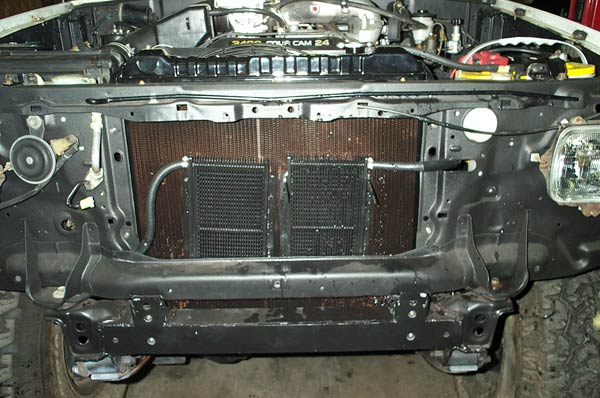
Since this truck was going to see off-road and big tires we decided to run a small transmission cooler as the P/S cooler. We also decided to run an auxiliary transmission cooler for the same reasons. The only place we found suitable to mount these was between the condenser and the radiator. We first mounted them with zip ties for mocking up. Once we start the truck and everything is bled we’ll mount them with the handy radiator ties that the coolers come with and re-install the A/C condenser.
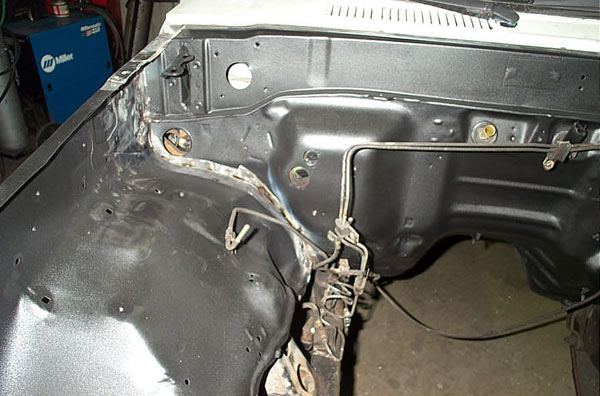
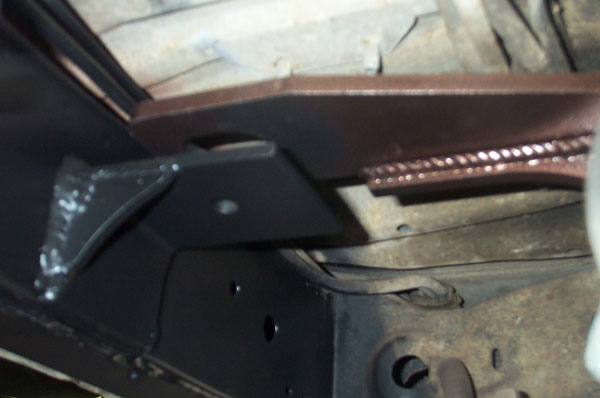
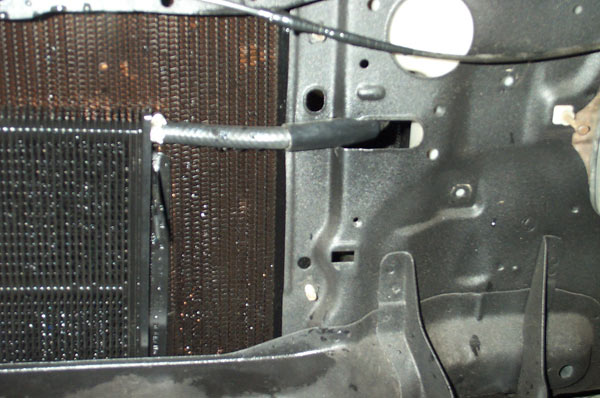
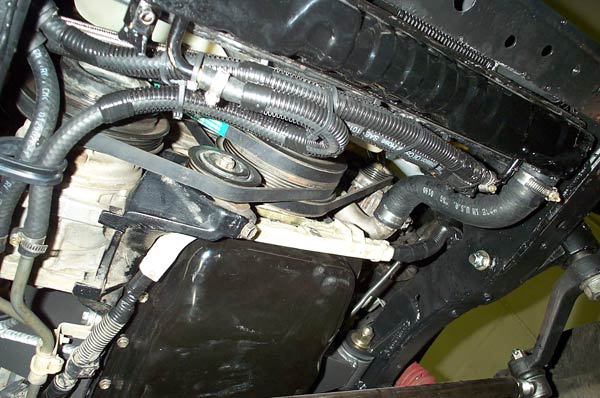
We had to cut holes in the body on each side to run the hoses back to the engine bay. You never think of this stuff when it would be the easiest (before painting)……………… As you can see we went to great lengths to properly route and shield these hoses to prevent any premature problems.
From there we routed the trans fluid from the transmission fluid lines through the radiator trans cooler and aux. cooler. We also installed the ORS high pressure power steering hose and return hoses. We plumbed the P/S cooler on the return side. We use 3/8” oil cooler hose (cut to length) for our transmission cooler hose and P/S return hose. This is also included in our kits. We carefully shielded and routed all these hoses, it was quite an ordeal but worth the trouble savings down the road.
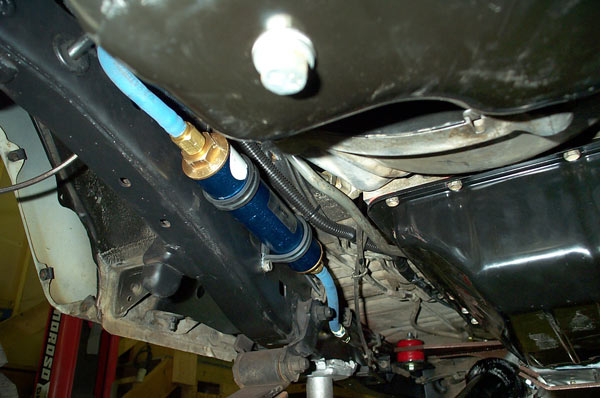
Next came the fuel hoses. We normally sell a fuel hose extension with our kits that mates the 3.4L fuel hose to the frame high-pressure side. 4cyl trucks require the installation of a fuel filter, the 3.0L’s don’t. We normally flare the fuel lines near the tank and install a 3.0L filter. We thought we’d try something different this time. We tried out a large racing fuel filter. The nice part is that it fits the ORS fuel hose fittings. It’s also easy to service and simpler to install. It’s also pretty huge……..
Intake and Finish Work
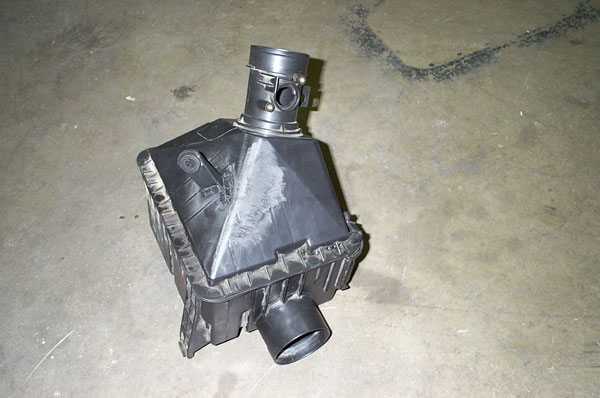
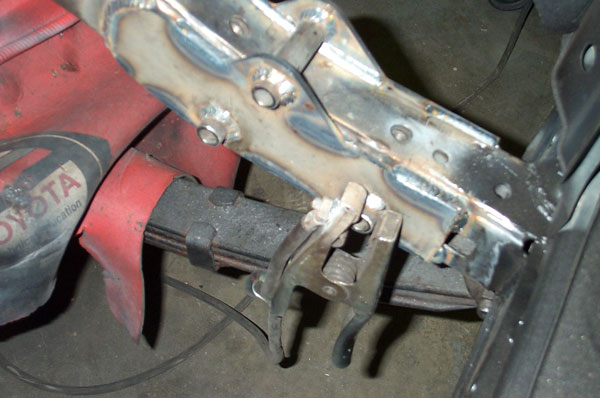
This customer is interested in a snorkel down the road. Although something would have to be retro-fitted, the best starting place is the stock intake box. The donor intake box had a crack in it from the rollover. We decided to repair it using our plastic welder. It went very smooth.
These stock 3.4L intake boxes fit but the mounts don’t line up with anything useful. The lower mount can be left in place. We drilled a hole to accommodate this one. The other 2 mounts were removed and re-welded (oh yeah..) to a useful place. Now the intake mounts quite nicely.
We have everything plumbed, wired, routed, mounted, etc. We filled the fluids and turned the key. It wouldn’t start. After some thinking, the boss’ wife asked if it was out of gas…… It was. We wish we could say this was the first time this happened in a swap. After some fuel, it fired right up and ran great.
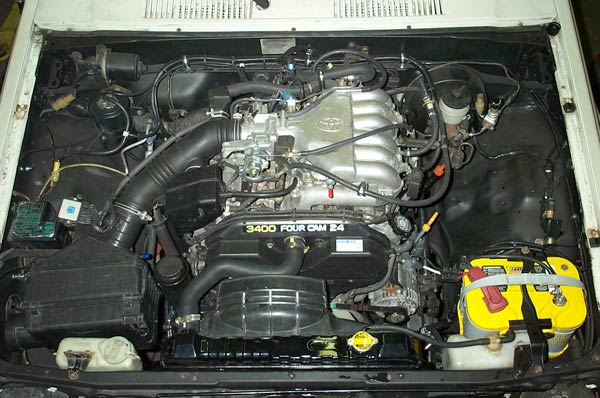
We have finished cutting the hood, installed the scoop and tested the truck out. Everything runs great and looks great too! If you have any questions on this build, please feel free to e-mail us. We would love to answer them.