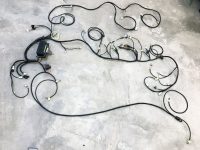
MONSTER HARNESS
(Body Replacement-Type)
Install Notes
NOTICE TO CUSTOMER: If there is a problem suspected with the wiring harness, call ORS. DO NOT cut, alter, or dissect the ORS conversion harness. ORS accepts no responsibility for a harness that has been tampered with.
If wire colors or connections described in these instructions do not match your specific application, please call ORS, we will gladly assist.
Preparation:
- Do not connect the negative battery terminal until the wire harness installation is complete.
- All body wiring should be removed from the vehicle prior to installation. On ’84-’95 models, the front fenders will be removed to do this and should remain off until the install is complete.
- Save the original body wiring as all grommets and diodes from the original wiring, they will be used on the new wiring.
- Be sure the engine wiring harness is properly installed on the engine and all connectors are plugged in. Route the engine harness lead down the intended side of the engine and transmission.
- We highly recommend wrapping the wiring harness with heat tape or exhaust wrap anywhere it passes close to the exhaust.
- Connect the engine harness to the oxygen sensor lead(s).
- OBD2 engines: Depending on your application, there may only be one oxygen sensor connector in the engine harness. If only one is found, the other is contained in the ORS harness and will be connected later.
- Be sure the wiring harness is secured clear of exhaust parts or sharp edges to prevent damage.
- Route the engine wiring harness main loom into the interior through the RH firewall. Choose a suitable mounting location for the ECU (engine computer).
- If using the battery cable harness from the donor engine: Do not use the alternator connections (3-wire connector + small cable) in the original battery harness, use only the starter connections and larger battery cables. The Monster harness will contain all alternator connections. If desired, the alternator connections can be cut back and taped off.
Monster Harness Install:
- Note: The next step can be very difficult, but possible when connectors are put through the holes one at a time. In extreme cases, these holes can be enlarged, but we recommend carefully fitting the harness through the existing holes so the original grommets can still seal these holes.
- Start with the Monster Harness outside the vehicle. The main fuse box will be located under the hood, on the RH fender area. ’84-’95 models: Carefully route the interior portion of the harness out the RH inner fender hole, then through the outer RH hole in the firewall, between the inner fender and outer fender. ’79-’83 models: Carefully route the interior portion of the harness through the hole in the RH firewall, into the interior.
- Once the interior portion is inside the vehicle, install the harness across the firewall area, and down each side following the route of the original wiring and the supplied illustration. Route any remaining wire harness out the LH firewall hole into the engine bay.
- Install any interior and under-vehicle sub harnesses following the original routing and the provided illustration.
- Install the wiring under the hood and in the front of the vehicle following the original routing and the provided illustration.
- Make any connections that were not made while installing the Monster Harnesses and sub-harnesses.
- If applicable: Locate any connections in the Monster Harness labeled for ‘diode’. There is normally 1-3 diode connections. Find the same connections in the same place on the original body wiring. In the body wiring, they are often hidden under tape and will need to be uncovered. Remove the small diodes from these connections in the original wiring and install in the same place on the Monster Harness.
- Remove all grommets from the original body wiring where the harness passed through the body. They can be carefully sliced with one slit to pull off the original wiring. Place each grommet in the same location on the Monster Harness to protect the harness where it passes through holes in the body.
- Hard-mount relay/fuse box(s), external relays and ECU.
- Connect all body ground eyelets lead using a sturdy mounting bolt to a suitable ground location.
- Connect the ORS Monster Harness to the ECU and engine wiring harness.
- Important: If this step is not performed before engine is started, oil gauge damage may occur. If the vehicle has an oil gauge, be sure the engine has on oil sender (not switch). If the vehicle only has an oil light, be sure the engine has an oil switch. Senders and switches from Toyota truck engines use the same threaded hole in the engine block.
- Connect the ‘Battery Positive’ eyelets to the battery + terminal.
- The first couple inches of the main ‘battery positive’ lead may be constructed of fusible-link material. This small section will fail in the case of this cable shorting before the main fuse. If a short occurs (during the life of the harness), replace with the same size fusible link wire after the short is corrected.
- If applicable: The ‘OBD2 Diagnostic Scanner Connection’ can be mounted in a convenient location and is only used to connect to an OBD2 scanner.
- Follow provided ‘battery cable’ (Front Battery, Rear Battery) diagram to add required battery cables and grounds.
- Connect the terminal x post ground lead to a chassis ground (if provided) and connect the negative battery terminal to the negative battery post.
- Open spaces in the fuse box can be utilized for additional circuits. One side provides power at all times, the other w/ the key ‘on’. Contact ORS for terminal pigtails to add circuits.
- Some ORS lighting circuits will not have a dedicated ground wire. In this case simply ground each lamp to the body/chassis where the lamp is mounted.
Connect negative battery terminal.


