*****NOTICE TO CUSTOMER: If there is a problem suspected with the wiring harness, call Off Road Solutions. DO NOT cut, alter, or dissect the ORS conversion harness. Off Road Solutions accepts no responsibility for a harness that has been tampered with – NO EXCEPTIONS.*****
Important: In its original application, Toyota uses a computer to control the operation of the E-Locker. In this system, various inputs are used to control differential operation, such as 4WD mode and vehicle speed. This computer-controlled system is designed for operator safety and differential reliability. When using the ORS E-Locker Wiring Harness, the operator is given full control of the locker operation. This makes the driver responsible for judging the appropriate timing of E-Locker operation.
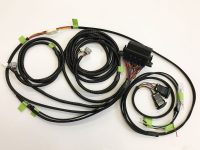
- There are 2 parts to this harness, one for the interior, on for the engine bay.
- Set the interior portion in the LH under-dash area of the vehicle. The locker switch lead is designed to mount near the steering wheel or center console area.
- The wire labeled “to ignition on source” should be spliced to a power source that is 12V only when the key is in the “on” position. This will only allow the locker to function when the ignition is on. If full time operation is desired, this should be connected to a constant 12V power source, such as the battery positive terminal. Note: Since the ORS harness has a fuse holder at the end of this wire, it can be spliced to any ignition circuit, regardless of the circuit’s fuse size.
- If an illuminated switch is used: locate the ORS wire labeled ‘to illumination + wire’. Splice this wire to the 12v positive wire in any illumination connection under the dash, such as lights inside switches. This is often a green wire, sometimes w/ a stripe; that will have 12v with the tail lights on. Locate the ORS wire labeled ‘to illumination rheostat or body ground’. If dimming ability of the illumination light in the switch is desired, splice this wire to the ground side illumination wire at the same source. This is often a white wire w/ a green stripe that will have variable resistance to ground, depending on the rheostat position. If dimming ability is not desired, connect this wire to body ground.
- ’95 and older 4Runner/Truck: Route the ‘C1’ connector behind/under the radio and to the RH under-dash area, near the RH kick-panel.
- ‘95 and earlier 4Runner/Truck: Mount the relay/fuse box near on the RH fender-well, in the engine bay. Some harness will be provided with 2 Fuse Box x Battery wire sets. Use whichever length is proper based on the mounting location of the relay/fuse box.
- ‘95 and earlier 4Runner/Truck: In the under-hood harness, route the C1 connector-lead through the RH side hole/grommet in the firewall. If a hole does not exist, drill a hole large enough to clear the C1 connector. Be sure to install a grommet around the harness as it passes through the firewall to prevent wire damage.
- FJCruiser/FJ80 LandCruiser/96 and newer 4Runner/Tacoma: Mount the relay/fuse box near on the LH fender-well, in the engine bay. Some harness will be provided with 2 Fuse Box x Battery wire sets. Use whichever length is proper based on the mounting location of the relay/fuse box.
- FJCruiser/FJ80 LandCruiser/96 and newer 4Runner/Tacoma: Route the C1 connector lead through the LH side of the firewall, using an existing grommet. Be sure the grommet protects the harness from resting against the sheet metal.
- In the interior, connect the C1 connector from both parts of the Elocker harness.
- Rear Locker: Route the rear locker lead down the firewall along the brake/fuel lines. Then route the locker lead rearward along the frame to the rear suspension. Route the lead down the brake hose or an upper control arm, to the rear differential and connect to the locker.
- Front locker: Route the locker lead forward along the frame and then drop down above the axle to the differential and connect to the locker. On coil spring systems, it is advised to run this lead down the upper control arm.
- Be sure all wiring is secure by way of zip ties, routing clamps, etc. Be sure the wiring harness does not touch and sharp edges and is clear of any heat or moving parts.
- In addition to the main connector, locking differentials will also have a 2-wire connector. This connector is only used when the indicator upgrade is built into the ORS Elocker harness.
NOTE: In some rare applications the Toyota limit switch in the actuator is oriented in the opposite direction. In this case your locker would be on w/ the switch (and light) “off”, and the locker would be off when the switch was “on”.
To correct this condition, first disconnect the negative battery terminal. Remove the relay labeled “3” from its connector. Using the engraved ‘terminal’ labels on the bottom of the relay as a reference, locate terminals ‘87’ and 87a’ in the relay/fuse box. Swap the positions of the 87 and 87a wires in this #3 connector. Using a long pick and a flashlight, unlock the terminal from the box; this is done from the relay side of the connector.
Before re-installing the wires, be sure the lock tab on the terminal is still bent out. Push the wires into their new positions until a “click” is heard. Make sure the terminal is locked into place and re-install the relay. Connect the negative battery terminal.


